 Hi Readers,
In this article, we will discuss steps to Enable Outlook Add-in for Microsoft Dynamics NAV 2017.
This is one of the most requested articles, sorry for the delay and I hope this answers all questions.
For Enabling outlook add-in with Microsoft Dynamics NAV
(in-prem only) we require -
- SSL Certificate.
- Certificate Thumbprint.
- Web Client Installed.
If you have not purchased SSL Certificate and require Outlook Add-in for Demo / Testing then Please refer article
How to Create SSL Certificate.
How to Create SSL Certificate.
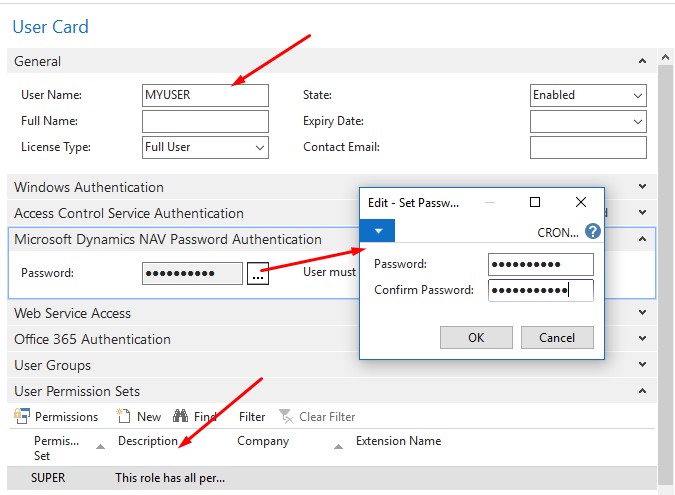
1. Create a User in Database with username and password.
I am using Username - MYUSER & Password - *Myuser123#.
2. Create a New Microsoft Dynamics NAV Service Instance for UserName Password.
I am creating a Service Instance Name - SECURE with Port 20, 21, 22 & 23.
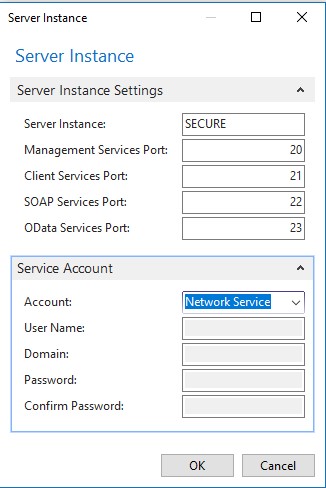
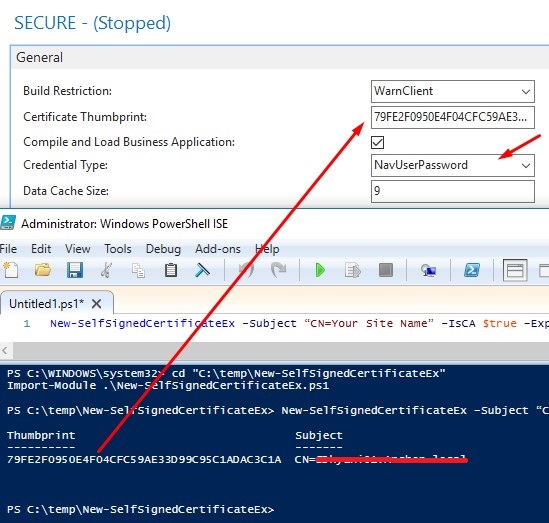
Credential Type = NavUserPassword.
Certificate Thumbprint = Your SSL Certificate Thumbprint.
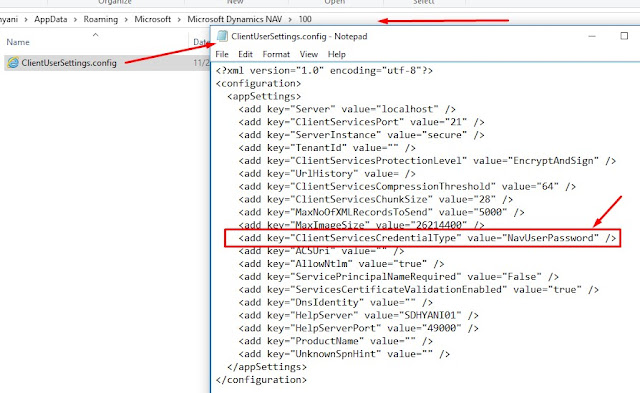
4. Update Configuration File For Windows Client.
a. Run Notepad as Administrator.
b. Open-File "ClientUserSettings.config".
c. File - C:\Users\<<User Name>>\AppData\Roaming\Microsoft\Microsoft Dynamics NAV\100
Where - <<User Name>> - Windows User Name.
d. Update the Parameter ClientServiceCredentialType = NavUserPassword.
a. Run Notepad as Administrator.
b. Open-File "ClientUserSettings.config".
c. File - C:\Users\<<User Name>>\AppData\Roaming\Microsoft\Microsoft Dynamics NAV\100
Where - <<User Name>> - Windows User Name.
d. Update the Parameter ClientServiceCredentialType = NavUserPassword.

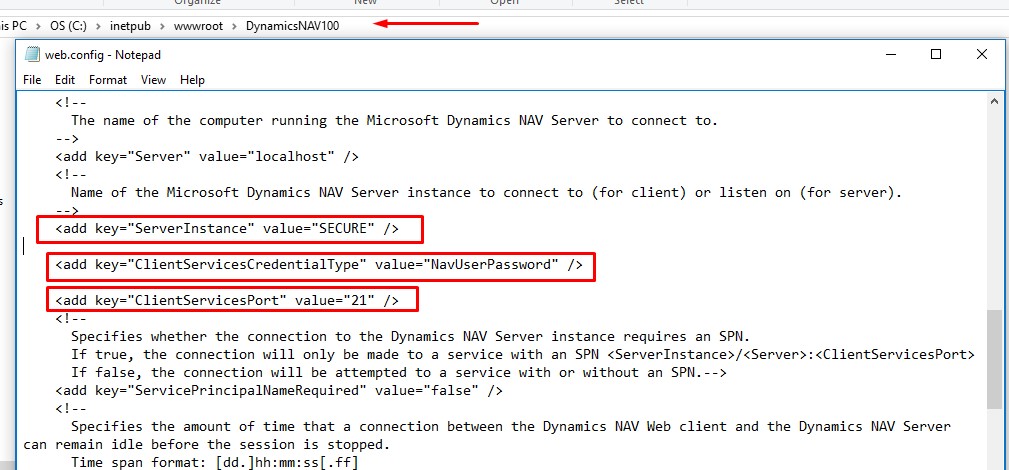
5. Update Configuration File For Web Client.
a. Run Notepad as Administrator.
b. Open-File "web.config". From Location - C:\inetpub\wwwroot\DynamicsNAV100
c. Search and Update the Parameters
Server Instance = SECURE. (** Service Name as per Step 2)
ClientServicePort = 21 (** Port Number as per Step 2)
ClientServiceCredentialType = NavUserPassword.
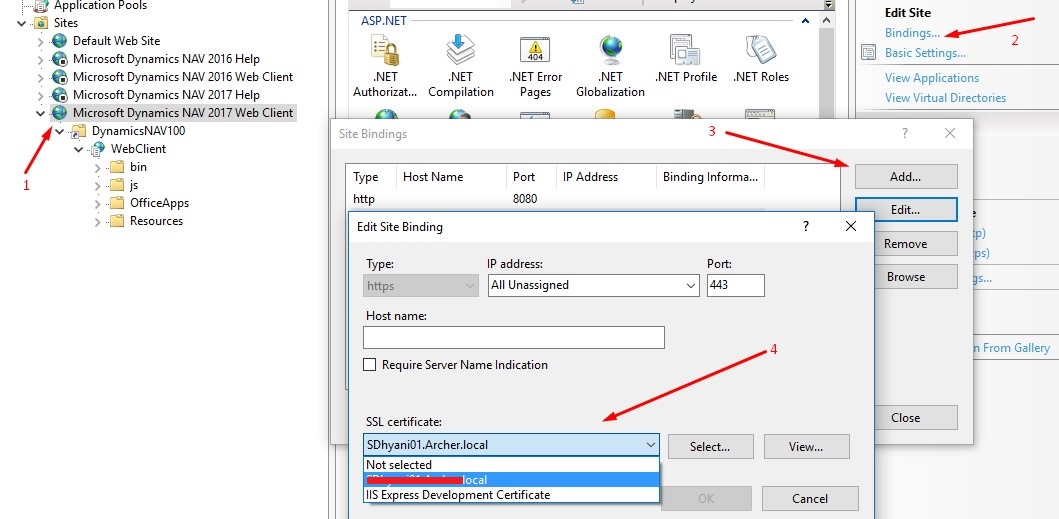
6. Add Certificate To Web Client.
1. Open ISS and Select Microsoft Dynamics NAV 2017 Web Client.
2. From Right Hand Panel Select Bindings.
3. Add New Bindings and Select Type = https and Select SSL Certificate.
1. Open ISS and Select Microsoft Dynamics NAV 2017 Web Client.
2. From Right Hand Panel Select Bindings.
3. Add New Bindings and Select Type = https and Select SSL Certificate.
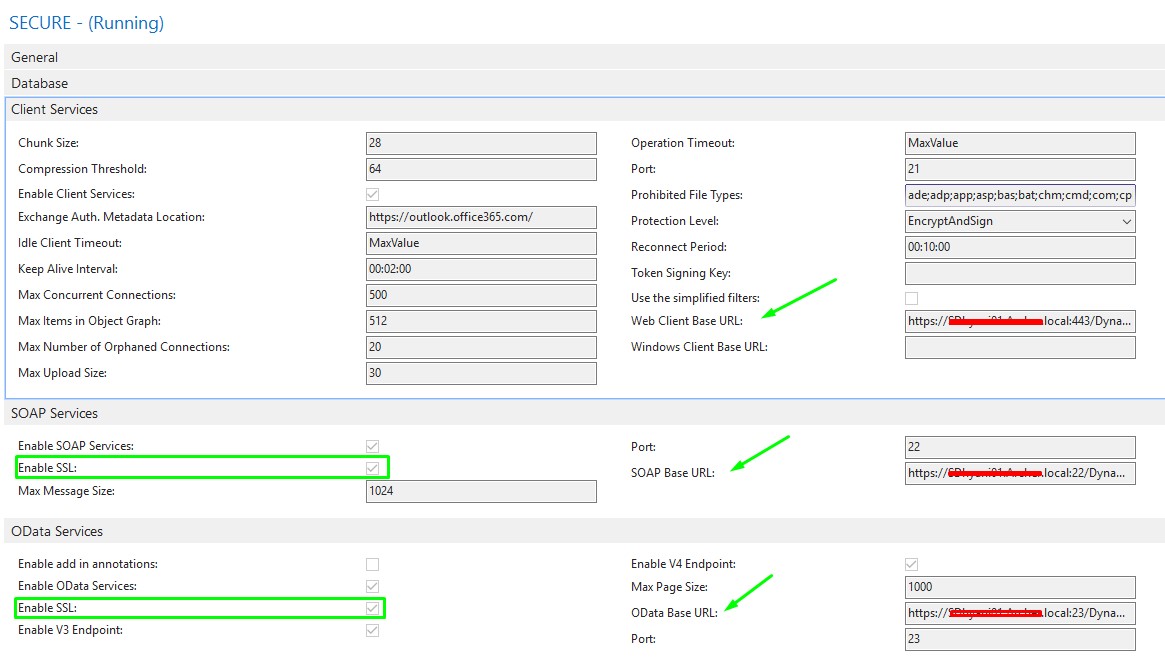
7. Update Service Tier with all Base URL.
Edit New Service Tier (SECURE) and Edit Following Parameters -
Web Client Base URL - https://<<Certificate Name>>:443/DynamicsNAV100/WebClient/
SOAP Base URL - https://<<Certificate Name>>:22/DynamicsNav/WS/
ODATA Base URL - https://<<Certificate Name>>:23/DynamicsNav/OData/
Where - <<Certificate Name>> - Is name of Certificate.
Port Numbers as per New Service Tier.
8. Setup Outlook for Financial.
a. Open Microsoft Dynamics NAV Windows / Web Client.
b. Enter User ID and Password Created in Step 1.
c. Once Login into Microsoft Dynamics NAV, and Navigate to -
Department - Administration - Application Setup - General - Assisted Setup.
d. Select Setup outlook for Financials and follow as below -

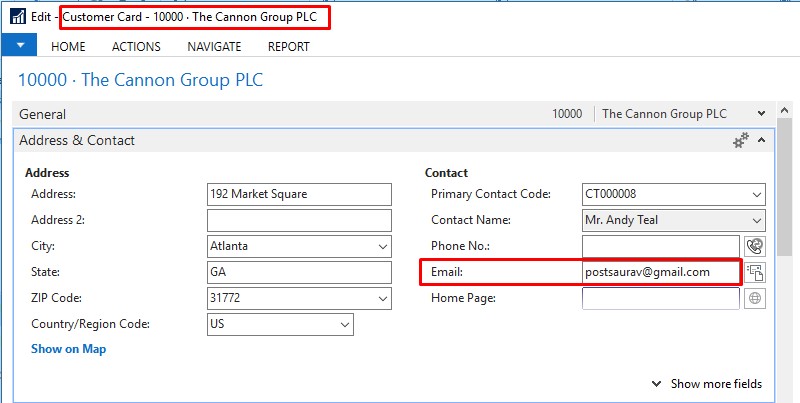
9. For Testing Link a Customer / Vendor With Email ID.
For Testing Outlook add-in, system link using Email ID.
Update Customers or Vendors with Email ID for Testing as below.
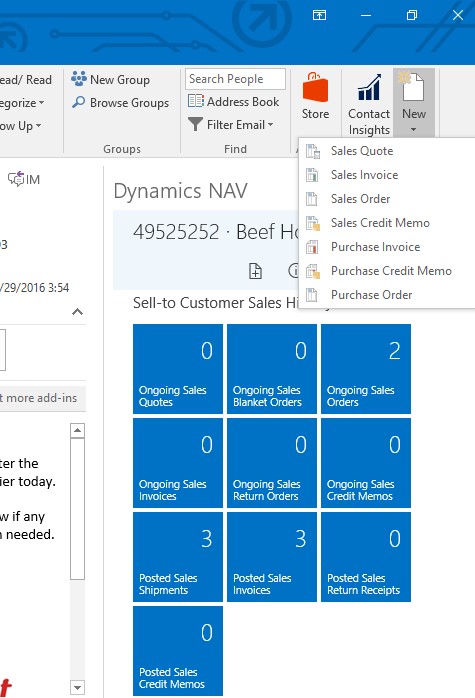
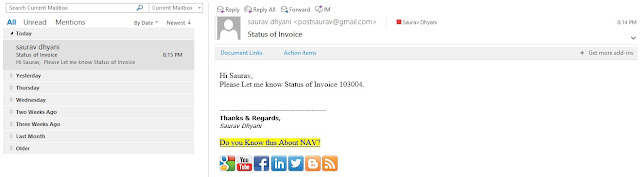
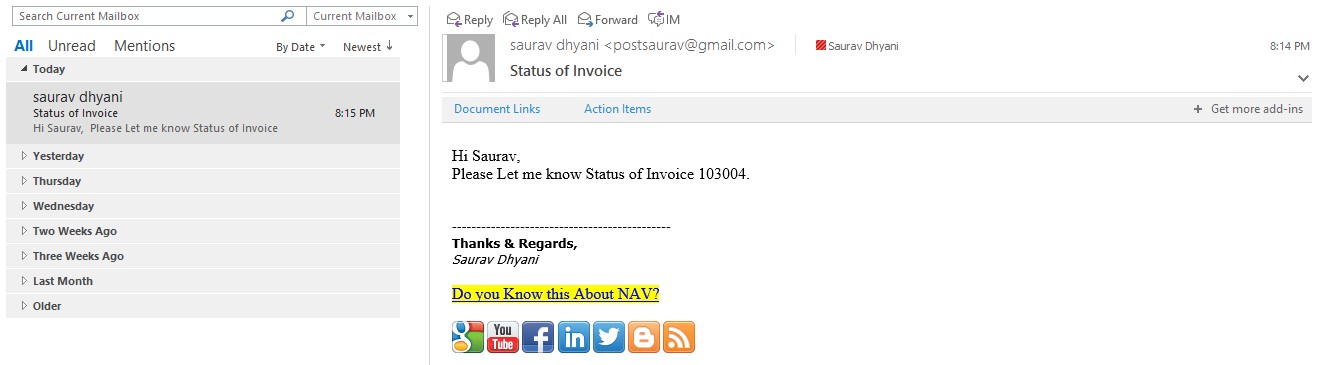
10. Send an Email and See Outlook.
Make Sure that you have an Invoice / Order for that customer. Then Send an email with that email ID defined in Customer with Request for Document Details.
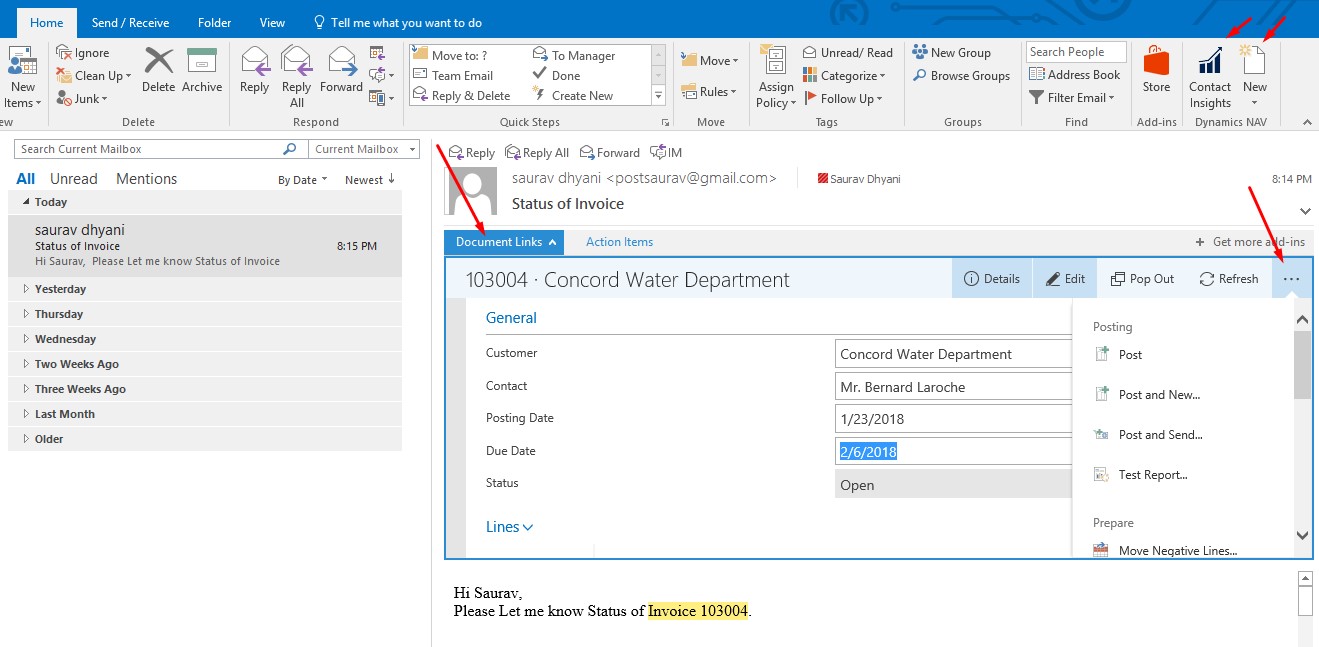
Once That is done Click on Document Link and you can edit / Modify and Process Document from Outlook itself.
If you want to Link an Email ID with NAV you can do that from Outlook itself. Use Contact Insights and if required you can add details to Microsoft Dynamics NAV.

If you want to Link an Email ID with NAV you can do that from Outlook itself. Use Contact Insights and if required you can add details to Microsoft Dynamics NAV.
Hope it helps. Let me know if any issues / Views about the article. But Please Read all steps above.
Regards,
Saurav Dhyani
Not working...
ReplyDeleteWhich version you are trying above steps.
Delete